Reina
Reina 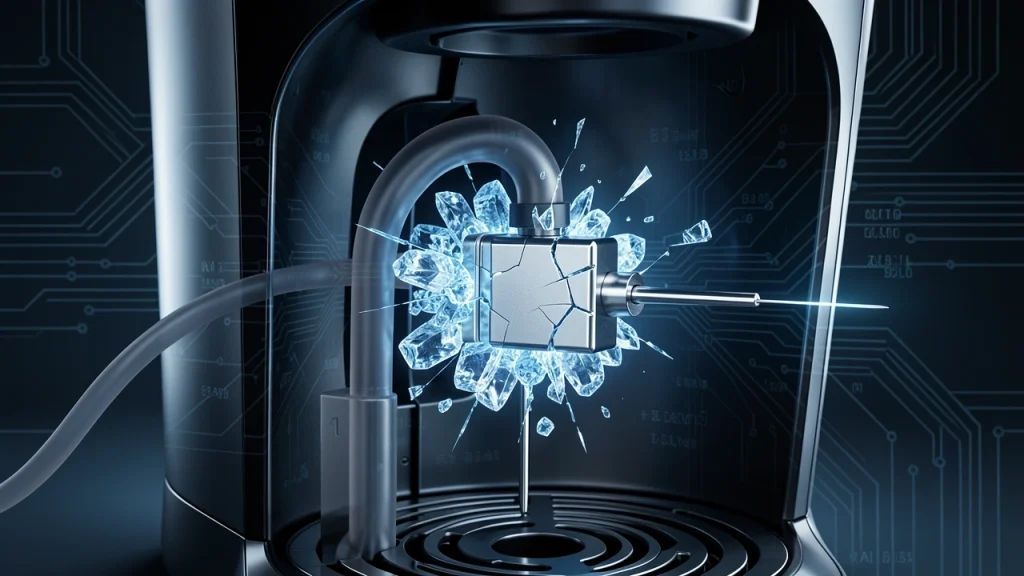
As an Amazon Associate, I may earn a small commission from qualifying purchases at no extra cost to you. This helps me create more valuable, tested content for you.
I lost two Keurigs before I figured out what was actually happening. The first one cracked somewhere inside the heating chamber during a November freeze in upstate New York.
The second one survived the winter but started leaking from the bottom the following fall. Both times I had drained the reservoir and run a dry cycle. Both times I thought I had done enough.
I have learned the hard way that emptying the water tank does nothing to protect the water trapped inside the pump line, the thermoblock, and the exit needle.
Those three hidden pockets are where the real damage happens. Ice expands, plastic cracks, and your machine is done.
This article walks through exactly where water hides inside a pod-style coffee maker and gives you two proven ways to protect it. One method works if you store the machine at home for the season.
The other lets you leave it in the RV through the entire winter. I also cover the weekend-warrior approach for people who camp through late fall and use the machine every other weekend.
Why a Simple Reservoir Drain Is Not Enough to Stop Winter Damage
When water freezes it expands by about nine percent.
That may not sound like much, but inside the narrow plastic tubing and sealed chambers of a coffee maker, that expansion exerts enough force to crack housing, snap internal fittings, and rupture the heating element housing.
Once that happens the machine is not repairable in any practical sense.
The common advice online says to empty the water reservoir and run a brew cycle until no more water comes out. That gets rid of the water sitting in the tank and the main internal line.
But it does not clear three specific locations where water stays trapped by design. Those pockets are sealed or shaped in a way that gravity and suction alone cannot drain them.
I tested this myself. After running a full clean cycle and tilting the machine at every angle I could think of, I disassembled the unit and found standing water inside the thermoblock.
There was also a bead of water stuck in the silicone tubing that leads from the reservoir to the pump. That single bead can freeze, expand, and crack the plastic fitting where the tube connects.
Mapping the Three Hidden Water Pockets Inside Your Keurig
The following breakdown applies to most standard reservoir-style pod brewers, including the K-Classic, K-Elite, and similar models from other brands.
Single-serve machines without a reservoir have fewer internal parts but still trap water in the heating chamber.
The Reservoir Intake Tube
This is the small-diameter silicone or plastic tube that runs from the bottom of the water tank to the pump.
Even when the reservoir is bone dry, a siphon effect holds a small column of water inside that tube. Tilting the machine does not drain it because the tube curves upward before reaching the pump.
That curve traps water at the lowest point.
I have seen this tube freeze and push itself off the barbed fitting at the pump inlet. When that happens, the pump cannot draw water ever again unless you open the machine and reattach the line.
On some models that repair requires removing the entire upper housing.
The Thermoblock or Internal Boiler
The thermoblock is the metal or plastic chamber that heats water on demand. In most pod brewers it holds between four and six ounces of water permanently. This is not the water from the reservoir.
It is a captive pocket that stays inside the heater regardless of how many empty cycles you run.
Running a brew cycle with an empty reservoir does pull some water out of the thermoblock, but only the portion that exits through the needle.
A significant amount remains inside the chamber because the heating element sits below the outlet port. That residual water cannot drain by gravity alone.
I disassembled a damaged K-Elite and found ice crystals inside the thermoblock despite having run three dry cycles before storage.
The crack ran along a seam where the plastic housing meets the heating element. That machine was a total loss.
The Exit Line and Piercing Needle
The exit line carries hot water from the thermoblock to the needle that pierces the pod. That needle has an internal diameter of roughly two millimeters.
Water inside that tiny passage freezes quickly because the metal conducts cold temperatures faster than plastic does.
When water freezes inside the needle it expands and can snap the tip off inside the pod holder.
I have seen this happen on a machine that was stored in a garage that dipped to twenty degrees Fahrenheit.
The owner had drained the reservoir and run a cycle, but a single drop of water remained inside the needle.
Scale buildup makes this problem worse.
If you have hard water, mineral deposits narrow the internal diameter of the needle even further, which means less water volume is needed to create a damaging ice plug.
Option 1: Full Disassembly and Air-Dry for Complete Winterization
This method is the safest option if you plan to store the machine at home or in a climate-controlled space for the entire winter.
It requires removing the machine from the RV and spending about twenty minutes on the process.
Start by unplugging the machine and removing the water reservoir. Empty the reservoir completely and set it aside with the lid open so it can air out.
Remove the pod holder assembly and the drip tray as well.
Next, place the machine on its side over a sink or towel. Use a can of compressed air with a thin nozzle attachment. Insert the nozzle into the water inlet port where the reservoir connects.
Give three short bursts of air. You will see water droplets blow out of the exit needle. Keep going until no more water comes out.
After that, tilt the machine at a forty-five-degree angle with the exit needle pointing downward. Let it sit for ten minutes. Then tilt it in the opposite direction for another ten minutes.
This allows gravity to move any remaining water toward the exit.
Finally, leave the machine upside down on a towel for at least twenty-four hours before storing it. The reservoir, pod holder, and drip tray should also dry completely before you pack them away.
The main drawback of this method is that it requires disassembly and a dry-out period. You cannot do this quickly at the campground on a Sunday evening before heading home.
That is where Option 2 comes in.
Option 2: The RV Antifreeze Flush for Machines That Stay Onboard
This method uses potable water antifreeze to fill every internal water pocket with a liquid that cannot freeze.
It is the same pink propylene glycol antifreeze that RV owners use to winterize their fresh water system.
It is safe for drinking water systems and will not harm the internal components of your coffee maker.
Critical warning: only use pink potable RV antifreeze. Do not use green automotive antifreeze, which contains ethylene glycol and is toxic.
Do not use windshield washer fluid or isopropyl alcohol. Alcohol can degrade the rubber seals and plastic tubing inside the machine over time.
Here is the step-by-step procedure I use on my own machine every November.
- Fill the water reservoir with undiluted pink RV antifreeze. Use enough to cover the minimum fill line, typically twelve to sixteen ounces.
- Place a large cup under the dispense spout to catch the liquid.
- Run a brew cycle without inserting a pod. Let the full cycle complete. The antifreeze will travel through the intake tube, the pump, the thermoblock, and out through the exit needle.
- Discard the cup contents into a waste container. Do not pour it down the sink if you are connected to a septic system, though small amounts are generally fine for RV holding tanks.
- Run a second brew cycle. This ensures the thermoblock is fully saturated.
- Run a third brew cycle. At this point the machine is pulling straight antifreeze from the reservoir and pushing it through every internal passage.
- After the third cycle, turn off the machine and let it sit for five minutes. This allows the antifreeze to coat the pump seals and internal gaskets.
- Empty any remaining antifreeze from the reservoir back into the bottle if you want to reuse it. Leave the reservoir lid open so it does not trap moisture.
That is it. The machine is now protected down to roughly minus fifty degrees Fahrenheit, which is the rated freeze point of most RV antifreeze products.
When spring comes and you want to use the machine again, fill the reservoir with fresh water and run three full brew cycles without a pod. Discard the water from each cycle.
The first cup may have a slight chemical taste, so I recommend running a fourth cycle with a vinegar solution to clean any residual antifreeze out of the lines.
The Weekend Warrior Protocol: Protecting a Machine in Periodic Use
If you camp from August through November and use the machine every other weekend, you need a fast way to go from winterized to operational and back again.
I developed this routine after losing a machine during that exact scenario in the Pennsylvania fall.
The key is to keep a dedicated bottle of pink RV antifreeze in the RV and a one-gallon jug of distilled water. The whole process takes about ten minutes each way.
Friday evening de-winterize for weekend use:
- Fill the reservoir with distilled water.
- Run three brew cycles without a pod. Discard each cup.
- Run a fourth cycle with a plain water rinse.
- Fill the reservoir with fresh water and use the machine normally for the weekend.
Sunday evening re-winterize before leaving:
- Empty the remaining fresh water from the reservoir.
- Fill the reservoir with pink RV antifreeze.
- Run three brew cycles as described in Option 2.
- Empty the reservoir and leave the lid open.
I keep a small plastic bin under the coffee maker to catch any drips during the re-winterize step. The antifreeze is sticky and can leave a residue on the counter if you let it pool.
This protocol works because the antifreeze only needs to be in the machine during the week when temperatures drop.
On weekends when you are camping and using the machine, the interior of the RV stays warm enough that freezing is not a concern.
Critical Safety and Chemical Considerations
I have seen several forum posts where people suggest using rubbing alcohol or vodka as a cheap alternative to RV antifreeze. Do not do this.
Isopropyl alcohol and ethanol can soften and swell the rubber seals inside the pump and the needle gasket. Over multiple seasons this causes leaks that are hard to diagnose.
RV antifreeze is formulated to be safe for potable water systems. It contains corrosion inhibitors that protect metal components like the heating element and the thermoblock.
Alcohol does not provide that protection and can actually accelerate corrosion in the presence of moisture.
Some people try to rely on heated storage bays or small space heaters to keep the coffee maker warm. That approach has two problems.
First, if the power goes out even for a few hours during a cold snap, the temperature inside the bay can drop below freezing quickly. Second, the temperature inside a storage bay is not uniform.
The floor of the bay can be twenty degrees colder than the air near the ceiling. Your coffee maker sitting on the floor sees that colder temperature.
I have also seen machines damaged by condensation. If you bring a cold machine into a warm RV and store it without letting it dry, moisture condenses inside the electronics and causes short circuits.
The antifreeze method avoids this because the machine is already filled with a non-corrosive liquid.
Frequently Asked Questions
Can I just leave my coffee machine in a heated RV bay?
You can, but it is not reliable. If the bay heater fails or the RV loses shore power, the temperature inside the bay will equalize with the outside air within a few hours.
A single night of single-digit temperatures is enough to crack a thermoblock. The antifreeze method is far more dependable.
How do I test if my machine has already been damaged by freezing?
Fill the reservoir with water and run a brew cycle without a pod. Watch for water leaking from the bottom of the machine or steam escaping from the upper housing.
If you see either, the internal plumbing has cracked. Also listen for a loud humming noise without water flow, which indicates the pump is running dry because the intake tube is disconnected inside.
A machine with freeze damage is usually not worth repairing.
Does this process work for espresso machines or pod-based machines other than Keurig?
It works for any machine that has a pump and a thermoblock.
Espresso machines with a boiler are a different case because the boiler holds a larger volume of water and often has a pressure relief valve that needs to be opened manually.
For those machines, consult the manufacturer winterization guide. For standard pod brewers, the antifreeze flush procedure is the same regardless of brand.
Will the antifreeze leave a taste in my coffee after flushing?
If you flush with three full cycles of fresh water, you will not taste any antifreeze.
Propylene glycol has a slightly sweet taste at high concentrations, but after a thorough rinse the residual amount is far below the threshold of detection.
If you are sensitive to taste, run a fourth cycle with a mixture of one part white vinegar and two parts water, followed by two plain water rinses.