The fiery punch of a wild chiltepin is a flavor you don’t forget. I first tasted it on a family trip to Arizona, a tiny red berry that exploded with a sharp, bright heat that vanished almost as quickly as it arrived. Years later, I grew my own plants from foraged seeds, determined to capture that fleeting wildfire in a bottle. This recipe is the result of that project, a simple sauce that honors the pepper’s untamed character.
It transforms a handful of potent ingredients into a versatile condiment with deep roots. We will make a classic, vinegar-based hot sauce that highlights the chiltepin’s unique qualities. Building on this foundation, we can explore the science and history behind every element in your kitchen.
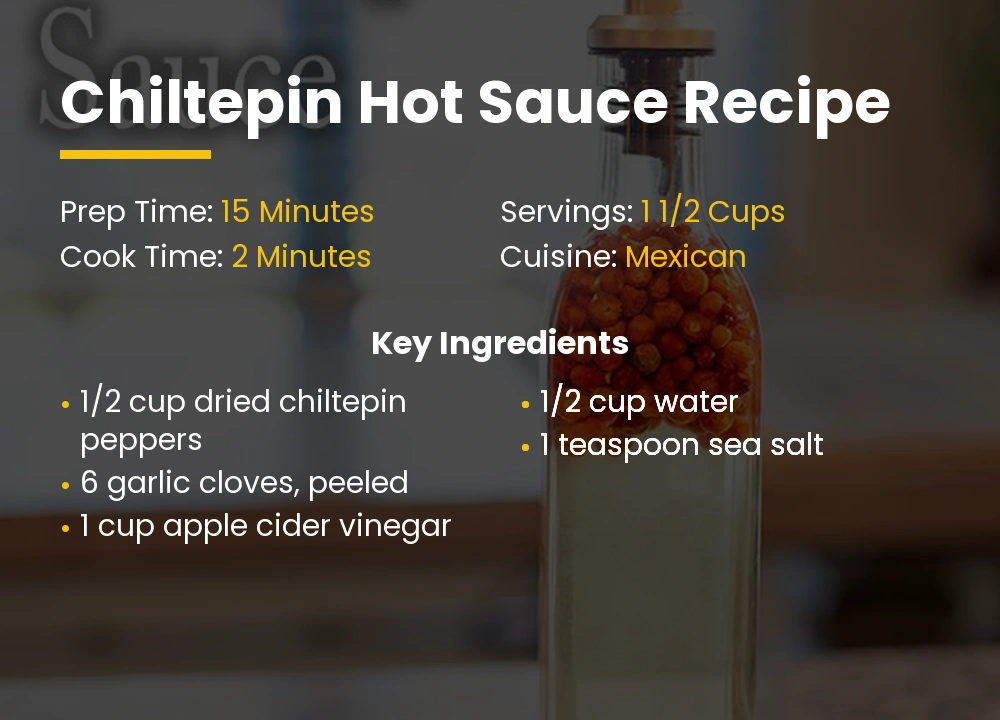
How to Make Chiltepin Hot Sauce Recipe
This process is straightforward, emphasizing the fresh flavor of the peppers. We use a quick simmer to meld ingredients without dulling their vibrant edge. The key is to start with a simple formula you can adapt later.
Recipe Details
- Prep Time: 15 Minutes
- Cook Time: 2 Minutes
- Total Time: 17 Minutes
- Servings: 1 1/2 Cups
- Course: Condiment
- Cuisine: Mexican
- Diet: Gluten-Free, Vegan, Low-Carb
Ingredients
- 1/2 cup dried chiltepin peppers
- 6 garlic cloves, peeled
- 1 cup apple cider vinegar
- 1/2 cup water
- 1 teaspoon sea salt
Instructions
- Combine all ingredients in a small saucepan and place it over medium heat.
- Bring the mixture just to a simmer, then immediately reduce the heat to low. You will hear a gentle bubbling and smell the sharp vinegar and garlic aromas.
- Let it cook for exactly 2 minutes to soften the peppers and take the raw edge off the garlic. The liquid will turn a light reddish hue.
- Carefully pour the entire contents of the saucepan into a blender or food processor. Secure the lid tightly, perhaps covering it with a towel as a precaution against steam.
- Blend on high speed for 1-2 minutes until the mixture is completely smooth, with no visible pieces of pepper or garlic skin remaining.
- Pour the sauce through a fine-mesh strainer into a clean bowl, using a spoon to press out all the liquid. Discard the dry pulp left in the strainer.
- Allow the sauce to cool to room temperature before funneling it into a sterilized glass bottle. Refrigerate it to preserve freshness and flavor.
Nutrition
- Calories: 5 kcal
- Protein: 0.2 g
- Fat: 0.1 g
- Carbohydrates: 1 g
- Sugar: 0.4 g
- Fiber: 0.4 g
- Sodium: 95 mg
- Cholesterol: 0 mg
Cooking Method
This recipe uses a quick infusion method. We simmer the solid ingredients briefly in the acidic liquid. This technique efficiently extracts flavor and heat while pasteurizing the sauce for safer storage.
Tools Needed
- Small saucepan
- Measuring cups and spoons
- Blender or food processor
- Fine-mesh strainer
- Funnel
- Glass bottle for storage
Understanding Your Core Ingredients
Each component in this short list plays a critical role in safety, flavor, and texture. Altering one changes the final product’s profile and shelf life. Let’s examine why these specific items are non-negotiable for a balanced sauce.
The Chiltepin Pepper
Chiltepins are tiny, round peppers that grow wild in the southwestern United States and northern Mexico. They are often called “bird peppers” because birds distribute the seeds. Their heat is intense but brief, registering between 50,000 to 100,000 Scoville Heat Units.
This places them significantly above a jalapeño but below a habanero. The flavor is sharp, smoky, and fruity, unlike the lingering, earthy burn of other chilies. You can use them dried or fresh, but dried are most common outside their native region.
Apple Cider Vinegar
Vinegar is the preservative backbone of most hot sauces. Apple cider vinegar adds a mild fruity tang that complements the chiltepin’s own notes. Its acidity, typically around 5%, creates an environment where harmful bacteria cannot thrive.
Some recipes call for white vinegar or Bragg’s raw apple cider vinegar. White vinegar offers a sharper, cleaner acid punch, while raw vinegar with “the mother” may contribute probiotic complexity. For this foundational recipe, standard apple cider vinegar provides the best balance.
Garlic and Salt
Fresh garlic cloves build a savory, aromatic base that grounds the pepper’s high notes. Salt is a flavor enhancer and a preservative. We use sea salt for its clean taste and consistent texture.
The amount specified controls fermentation if you choose that path and balances the sauce’s overall taste. In a simple, quick-cooked sauce like this, it primarily sharpens the other flavors on your palate.
Water’s Role
Water dilutes the vinegar’s acidity to a more palatable level. It also creates enough volume for the brief cooking step to work effectively. Without it, the vinegar would evaporate too quickly and the sauce would be overly harsh.
You could substitute lime juice for a portion of the water. This adds a bright, citrusy dimension that pairs exceptionally well with the chiltepin’s character, perfect for drizzling on tacos or ceviche.
Advanced Techniques and Adaptations
Once you master the basic formula, you can modify it to suit different tastes and applications. These methods offer greater control over texture, flavor depth, and fermentation benefits. Consider your end goal before you begin.
Fermentation for Depth
For a more complex, tangy sauce, ferment the peppers and garlic first. Replace the vinegar and water with a 2.5% salt brine by weight. Submerge the peppers and garlic in this brine in a jar for 1-2 weeks.
This process, called lacto-fermentation, creates beneficial probiotics and deep, nuanced flavors. After fermentation, you blend the solids with a small amount of the brine and perhaps a splash of vinegar to stabilize it.
Creating a Thicker Salsa
Many traditional salsas de chiltepin use tomatoes for body. Roast 8 Roma tomatoes, a small yellow onion, and 6 garlic cloves until charred. Blend these with 1/2 cup of chiltepins and a little vinegar.
The result is a chunkier, spoonable salsa with a rounded flavor. This version has a shorter refrigerator life, typically one week, due to the lower acidity from the tomatoes. It is excellent with grilled meats or eggs.
Using Xanthan Gum
If you dislike straining your sauce or want a thicker, smoother texture that won’t separate, xanthan gum is a useful tool. It is a natural powder that stabilizes emulsions.
After blending, add only 1/8 teaspoon of xanthan gum while the blender is running. It will thicken the sauce slightly and bind the liquid with any remaining solids. Use it sparingly, as too much creates a slimy texture.
Handling and Safety Notes
Working with potent chilies requires some basic precautions. Always wear disposable gloves when handling large quantities of chiltepins, especially if you have sensitive skin. Avoid touching your face, particularly your eyes.
Ensure your blending container is vented to prevent a dangerous steam explosion from hot liquids. When fermenting, use an airlock or burp the jar daily to release carbon dioxide pressure. Properly acidified or fermented sauces stored in the refrigerator are generally very safe.
Storing Your Finished Sauce
Store your hot sauce in a clean glass bottle in the refrigerator. The vinegar-based recipe will last for at least 6 months when chilled. Fermented versions are also stable for months under refrigeration.
For a truly shelf-stable product, you would need to process filled bottles in a boiling water bath, adjusting the recipe’s acidity for canning safety. For most home cooks, refrigeration is the simplest and most reliable method.
The Cultural and Nutritional Profile
Chiltepins are not just a source of heat; they are a cultural staple. In their native range, they are often harvested wild and used as a daily condiment. This connection to place is part of what makes the flavor so distinct.
From a dietary standpoint, capsaicin in the peppers may offer metabolic benefits. The sauce is very low in calories, sugar, and fat, making it a flavor-packed addition to many diets. Garlic provides allicin, a compound studied for its potential health properties.
Frequently Asked Questions
Can I use Thai chiles instead of chiltepins?
You can substitute Thai chiles, using about 2/3 cup, but the flavor profile will change to a sharper, more linear heat. Thai chiles lack the chiltepin’s distinct fruity and smoky notes, so the final sauce will be different but still delicious.
How do I reduce the heat of the sauce?
Remove the seeds from the chiltepins before cooking, though this is tedious with small peppers. A more effective method is to increase the proportion of other ingredients, like adding more roasted tomatoes or garlic, to dilute the capsaicin concentration.
Why did my sauce separate in the bottle?
Separation is natural in unfiltered or unemulsified sauces. Simply shake the bottle well before each use. To prevent separation permanently, use xanthan gum as a stabilizer during the blending process.
Can I make this sauce without cooking it?
You can make a raw version by simply blending all ingredients, but the flavor will be harsher and the shelf life shorter. The brief cooking step mellows the raw garlic and vinegar while better infusing the liquid with the pepper’s essence.
Is this sauce suitable for a low-sodium diet?
The sodium content comes primarily from the added salt. You can reduce or omit the salt, but this will slightly shorten the refrigerator shelf life and may make the flavors taste less balanced. The sauce will still be safe to consume if kept cold and used within a few weeks.